
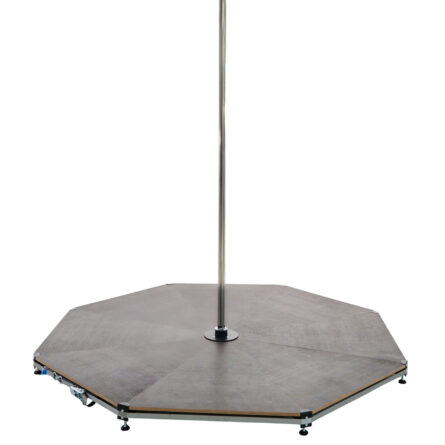

Portable Stage Pole Dance Pole with Platform
Are you looking for a convenient and safe freestanding pole dance pole for stage use? Our portable pole with a platform is the perfect solution.
-
Suitable for Suspended Ceilings
Since the pole doesn’t require permanent ceiling mounting, it can be installed in rooms with any type of ceiling. The only important factor is the height, as we may need to shorten the pole for lower ceilings.
-
Quick Mode Change During Performances
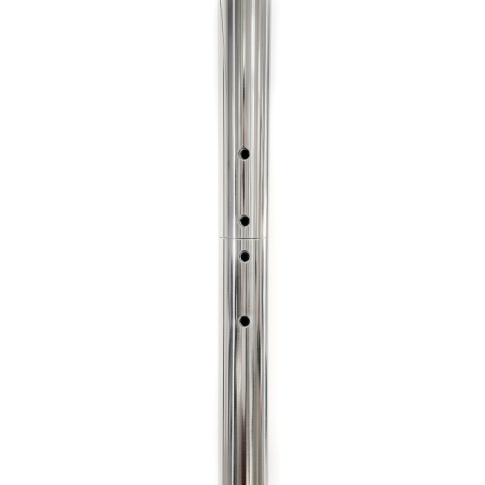
You don’t have to choose between a static and spinning pole. You can easily switch between spinning and static mode using a pin. Unlike most poles on the market that require unscrewing, ours can be changed with a single pin pull.
-
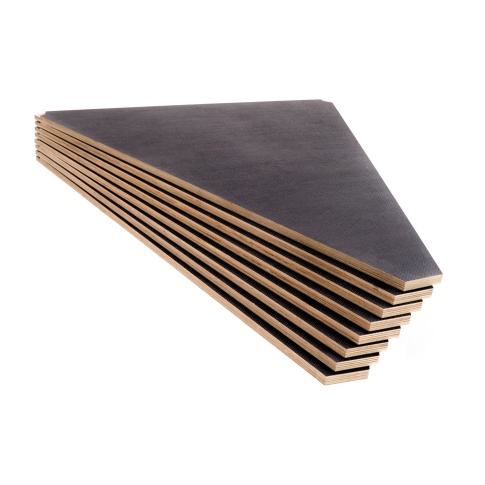
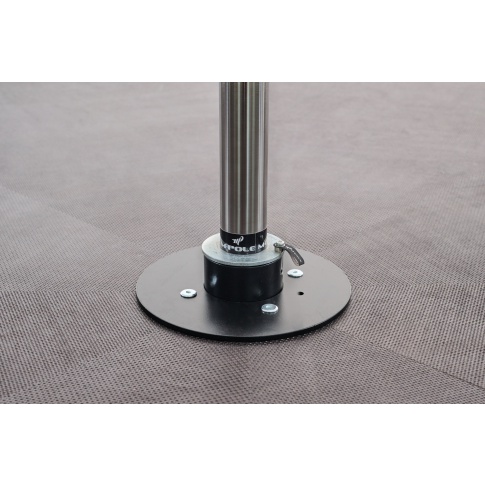
Wide Platform in Our Stage Pole
The platform, made of non-slip plywood, has a diameter of up to 210 cm, making it suitable for regular and safe home workouts.
-
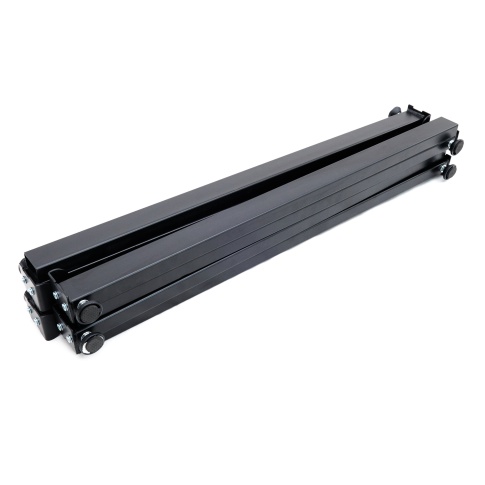
Transportable Pole
The entire pole, along with the platform, fits in the car trunk when folded.
 IMPORTANT! Personalized Product
The product is personalized, meaning it’s made to order for the customer. The pole is cut to fit the customer’s room dimensions. If you don’t provide room dimensions, you’ll receive a product with the longest possible pole.
Parameters
| Weight | 77 kg (5 parcels) |
| Lifting capacity | 150 kg |
| Platform diameter | 210 cm |
| Rod diameter | 42 mm |
| Height of the pole with platform | 280 cm (you need 310 cm to unfold the pole) |
| Pole length (folded from two shorter ones) | 270 cm |
| Assembly / disassembly time | 3-4 minutes |
| Warranty period | 6 months |
| Change of static/rotational mode | With pin |
| Material | POLE: Stainless steel polished or powder coated: white or black color PLATFORM: plywood |
| Return option | None – personalized product |
SET INCLUDES:
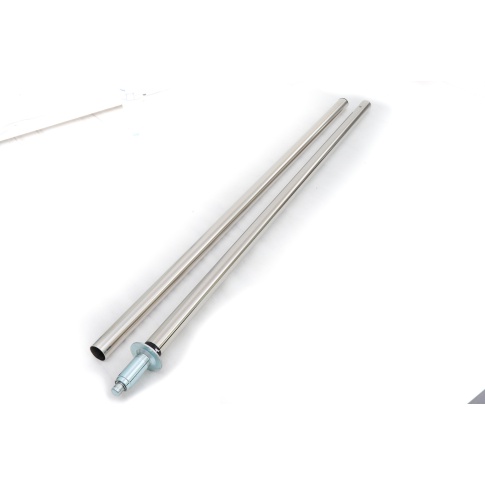
- the pole consists of two shorter poles, about 150 cm and 130 cm long, diameter 42 mm. If you choose a painted pole then the part above the platform is painted, while the one that goes into the platform is stainless steel
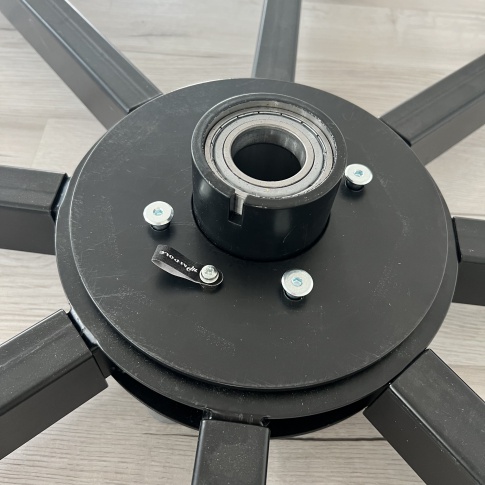
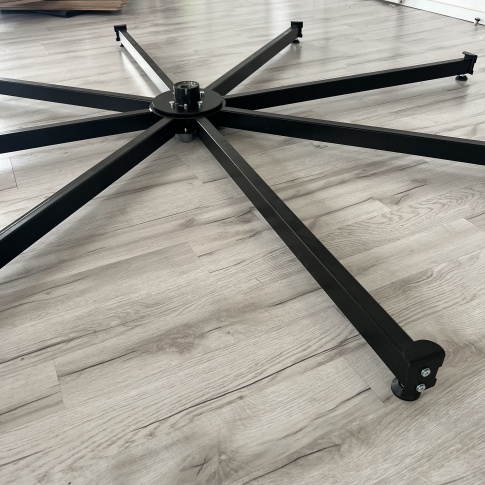
- platform/base – star
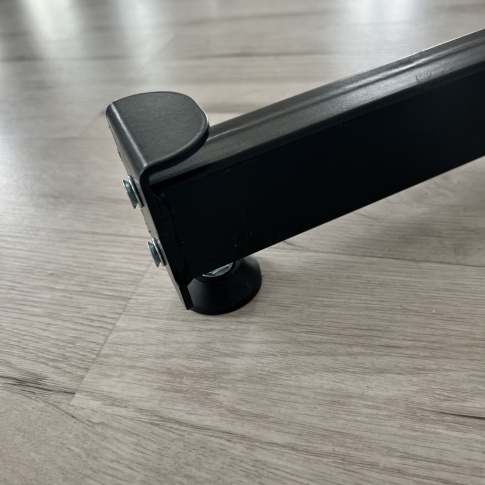
- 8 feet with rubber feet for height adjustment
- floor – 8 platforms
- legs with strap
- locking pin and key
DIMENSIONS:
- 2400x900x100mm, 18 kg
- 1070x770x150mm, 18 kg
- 800x240x150mm, 18 kg
- 800x800x100mm, 15 kg
- 800x800x100 mm, 15 kg
Safety notes
- Read the instructions carefully before first use and keep them for future reference.
- Consider all warnings and precautions including assembly steps. The equipment may only be used for its intended purpose.
- The equipment may only be assembled and used by an adult. Children should not use the equipment without adult supervision.
- The equipment must be checked for damage or wear before each use.
- Maximum load weight: 80 kg
- In order for the feet in the platform to extend and move easily the base should be on the floor (the centre should not hang in the air, the rubber feet must be tightened all the way!).
- It is forbidden to use the platform if there are cracks, deformations or severe dents on the steel parts.
- It is forbidden to use the platform if it is not assembled and installed according to the instructions or if there is play in the structure.
- In order to unfold the platform stably, it is necessary to press all the components together with a strap after assembly and to dismantle all the legs. All legs on the metal feet must be screwed in before assembly.
- Do not operate in static mode when the locking pin is crooked
- It is important to prevent dirt and small objects from getting into the rotating unit and the pole/ platform connection. If this happens, it must be cleaned. The bearing must be maintained and cleaned by yourself
- Do not pull the unfolded stage as the legs may break. The unfolded stage must be moved in two people by gripping the bases with the strap
- It is forbidden to remove the pole from the platform if the locking pin is not removed.
Deviations from the norm that can occur in any pole stage:
- Noise is allowed in the bearings (due to the floor not being perfectly flat).
- Pole unevenness allowed up to 3 mm per 1 m.
- Small scratches on the pole and parts are allowed if they are not perceptible to the touch (such scratches appear all over the pole after 2-3 weeks of active training).
- Slack at the insertion point of the pin to lock the pole into the static is allowed up to 1 mm along the outer diameter of the pole (the smaller the slack the more difficult it is to pull out/insert the locking pin).
- ATTENTION!!! If the platform is not unfolded according to the instructions, and all parts are not tightened then the pole may lean. Be careful and always check that the platform is securely installed before you start exercising! if the installation and operation rules are not followed, and if the floor is unstable where the pole is installed, the manufacturer is not responsible for any physical or material damage.
Warranty information:
- The warranty covers manufacturing defects only.
- The warranty period is calculated from the date of sale and is 6 months.
- The warranty covers the free repair or replacement of components that prove to be defective due to the manufacturer’s fault.
- The warranty service is provided upon prior notification of damage.
- The warranty service is not provided in case of:
– Failure to comply with the rules and conditions of transport, storage and operation of the product
– If there are traces of unqualified repairs or other activities on the product, which led to a loss of the consumer properties of the product.
– If damage by third parties is found.
– Damage caused by the elements, fire or other accidental external factors.
POLE STAGE assembly instructions
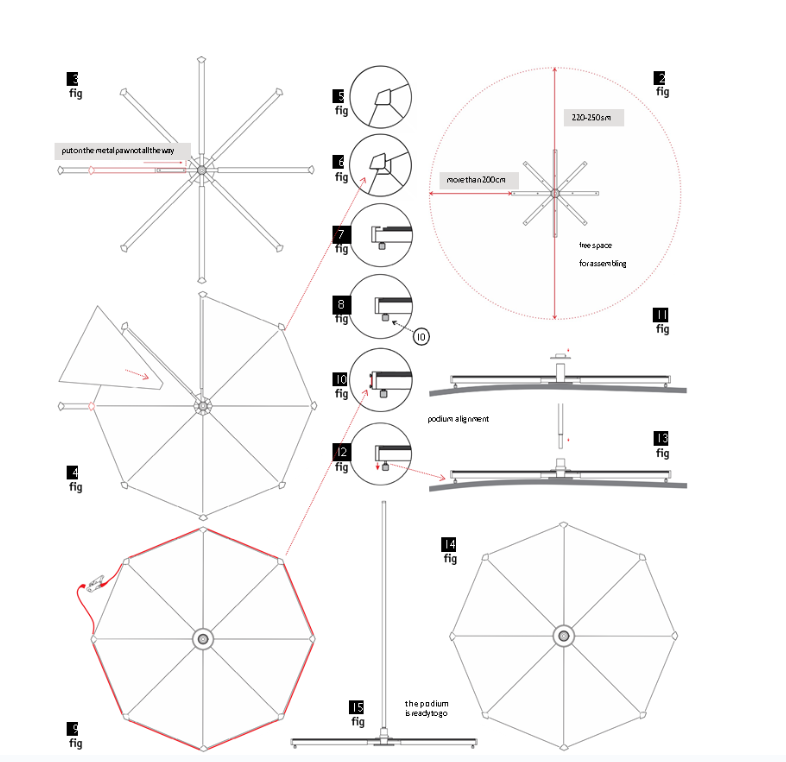
- Determine the location of the platform, lay out the stage base (star) taking into account the distance from walls and other obstacles of approximately 0.7-1 m
- insert the legs into the arms of the star, with the adjustment feet towards the floor, but do not insert them all the way, so that the triangles of the platform can be put on (fig. 3). Put on all 8 legs.
- Remove the 4 screws from the star and pull off the round plate.
- place the triangles of the platform on the legs, rough side up (groove up) or if you do not have a rough side of the floor then groove the corners up . The triangles of the floor must be placed close together so that the edges lie on the legs of the platform and are adjacent to each other. Push the legs inwards so that the ends of the legs slide onto the plates fig.6
- put the round plate back on the star and tighten the four screws without tightening them with the spanner
- Put the belt on to tighten the whole stage. Place the belt between the screws so that it does not slide down when putting it on. Place the belt around the structure so that the two ends meet. Place one end through the buckle and tighten until the platform is compressed and there is no slack between the plates.
- loosen the 4 screws in the middle on the plate with moderate force using a four-pronged Allen wrench.
- Insert the lower part of the pole into the centre of the platform ( the heavier part) remove the screws from the coupling and insert the coupling into the lower part of the pole. Screw in the two lower screws with your fingers not all the way in, just enough so that the connector does not fall down. We insert the other part of the pole and finger tighten another two screws. Using the allen key, start tightening the screws from top to bottom, i.e. in such a way that you tighten each screw as firmly as possible in turn starting from the top. Do not tighten, for example, one screw to its maximum tightness while the other is still unscrewed. Repeat the tightening process from top to bottom until the coupling is well spread inside the pole and the pole is stable at the joints. Tighten these bolts firmly but evenly on all four bolts- force 5-6 Nm. Over-tightening the final screw will cause the pole to bulge as too much force will be used and the screw will push the pole out the other side
- adjust the feet for stability of the pole by unscrewing them to approximately 4 cm/4.5 cm
The pole is in static mode when the pin is inserted into the pole. Removing the pole is always done in the rotating mode of the pole. To lock the rotation, align the hole with the groove and insert the locking pin vertically. To change the mode to rotary remove the locking pin.
The installed pole may sway slightly. This is acceptable as the micro-gap is necessary so that the pole can be inserted and removed without too much difficulty. When working with the weight of a person, the pole should rotate smoothly and steadily.
| HOW TO TIGHTEN THE SCREWS IN A FOLDING POLE.
You cannot immediately tighten one screw to the maximum while the other will still be unscrewed. Screw the screws in evenly, if you cannot screw a screw in check that the screw screws in perpendicularly to the threaded hole. Initially you do not need a lot of force to screw the screw in if this happens check that the screw screws in evenly 1. Remove the screw from the joint 2. Insert the joit 3. Tighten screws D and C leaving them 1 cm on top 4. Put the top of the pole on the joint and tighten screws A and B leaving them 1 cm on top 5. One by one, tighten screws D, C, B, A to the maximum in the order given, 6. Once you have tightened all the screws, some may come loose, so repeat the tightening in the order D, C, B, A, i.e. from bottom to top- force 5-6 Nm Repeat the tightening process from bottom to top until the coupling is well spread inside the pole and the pole is stable at the joints. Tighten these screws firmly but evenly on all four screws. |
Props Order Department: